
I promised updated pictures on the kitchen countertops. Here they are over a year later! I think almost two years, actually. They have held up amazingly well! 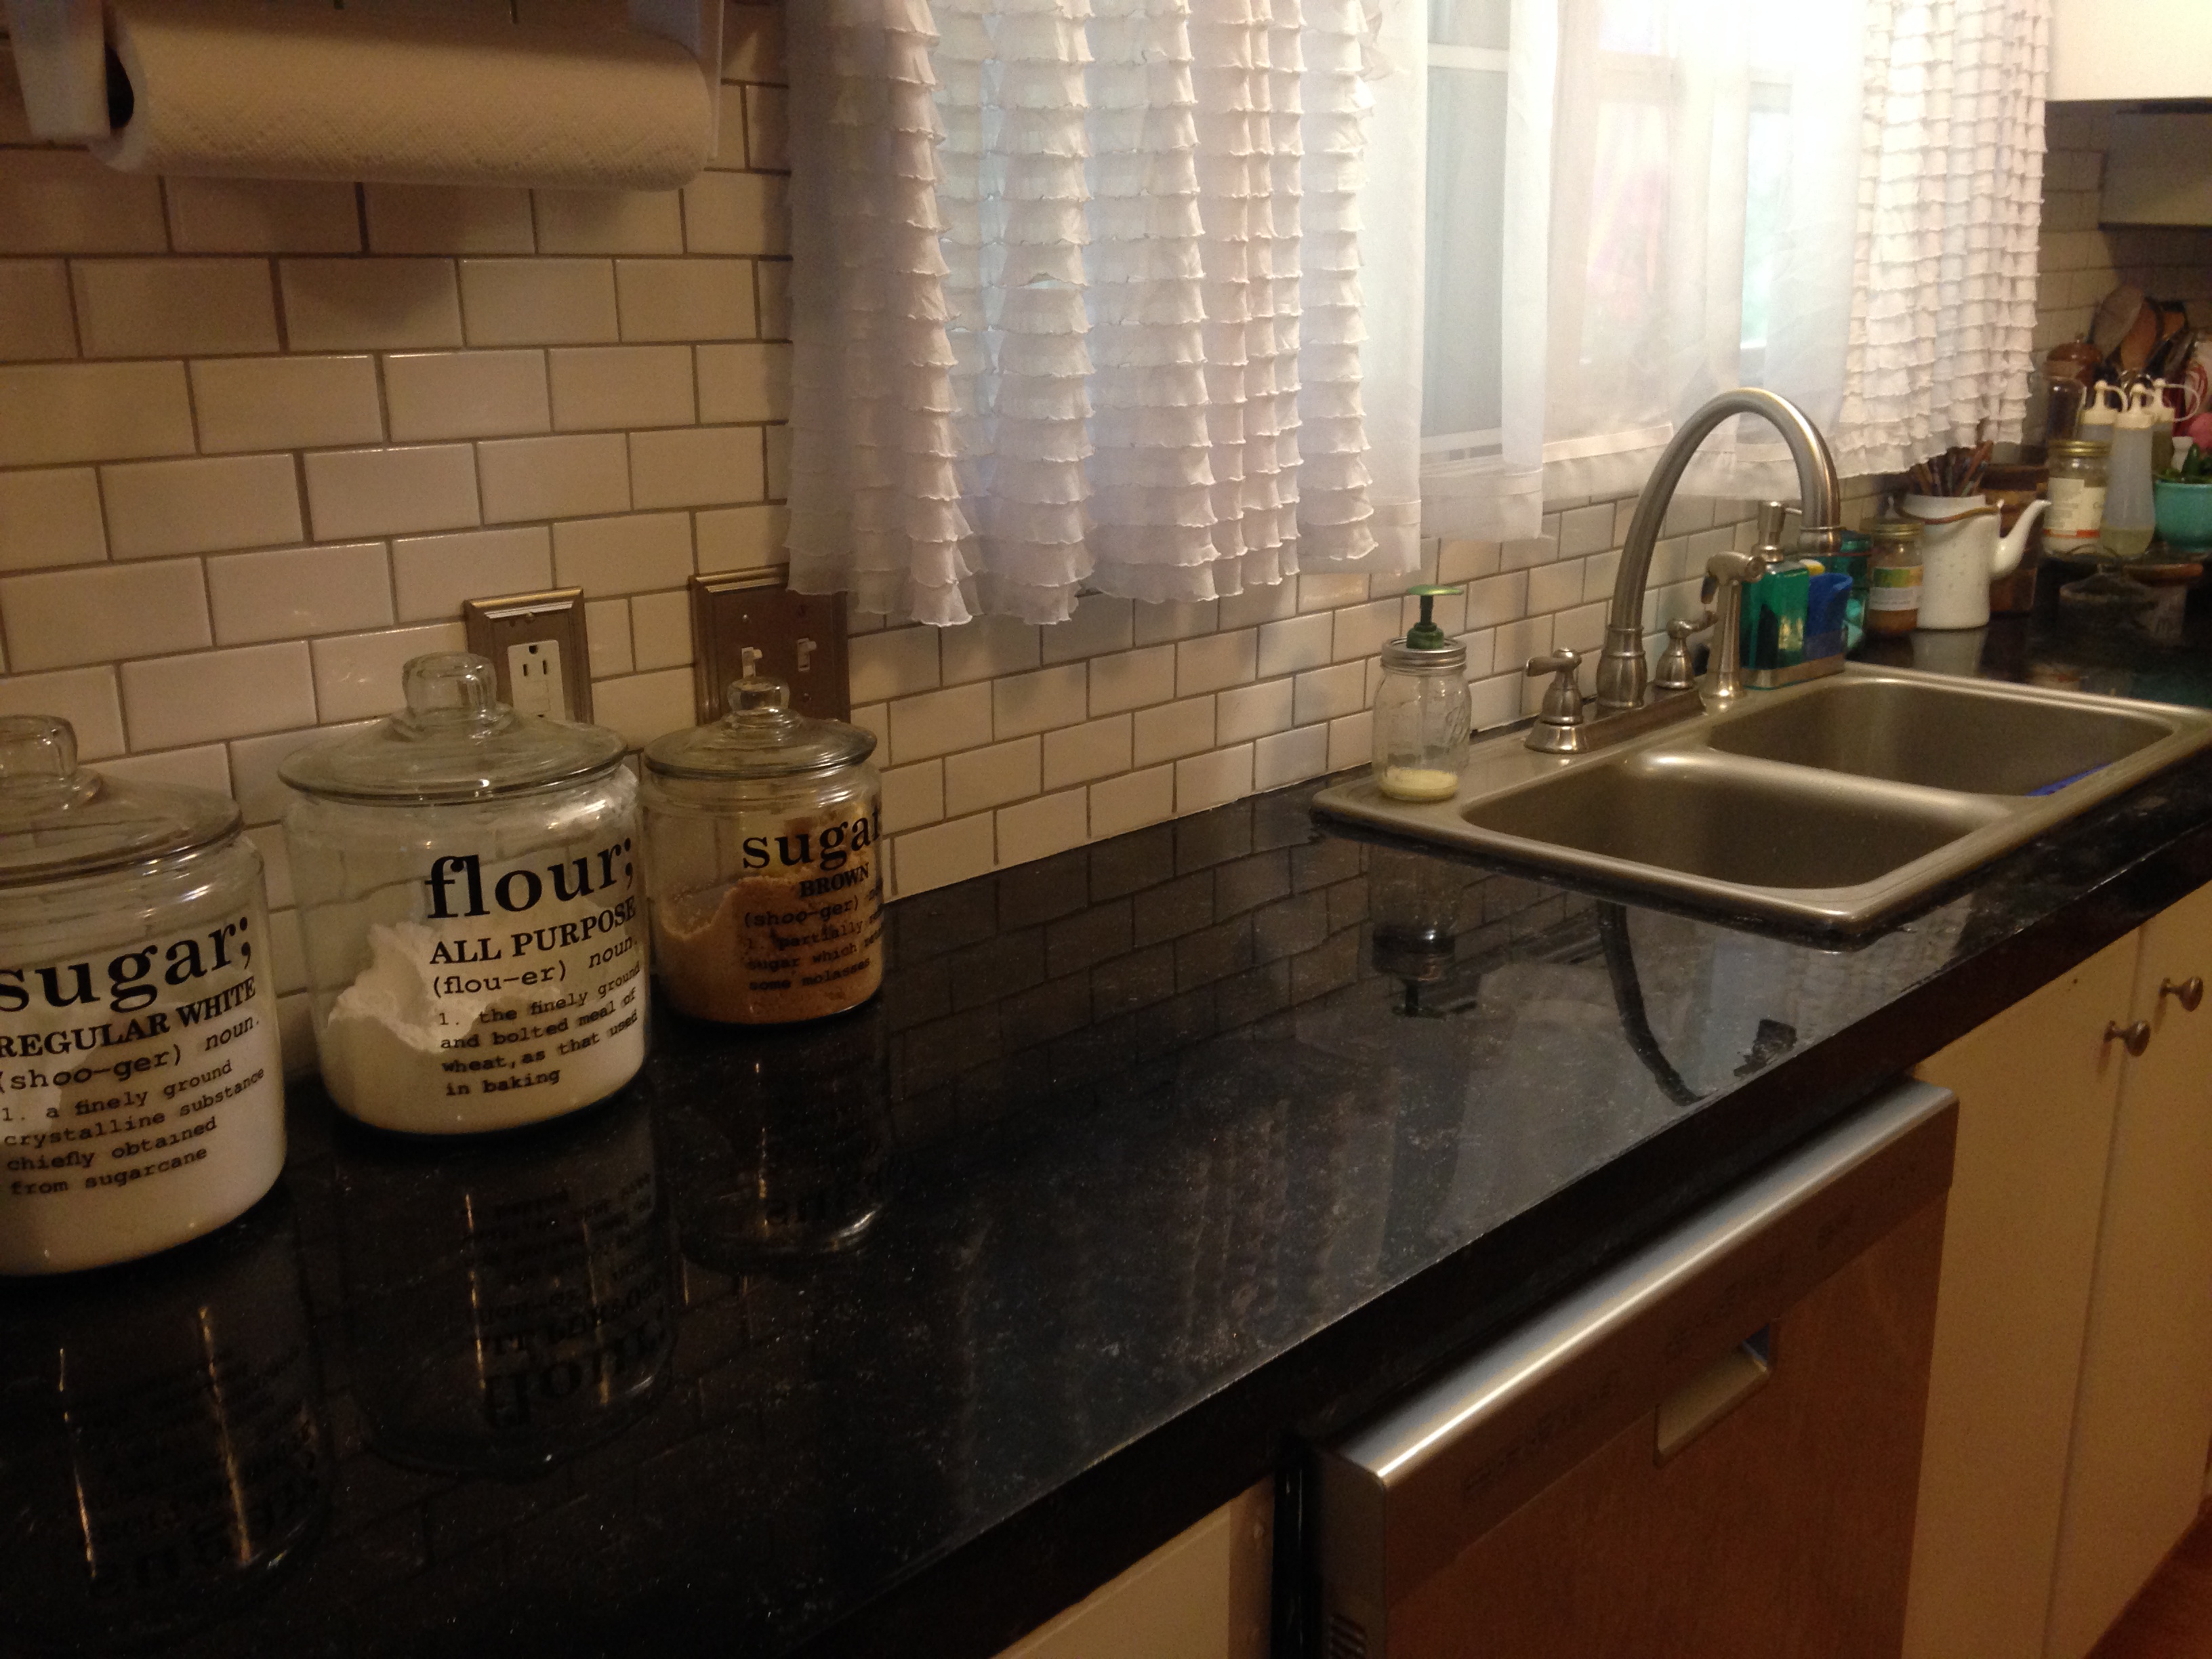


Tag Archives: remodeling
Painted and epoxied countertops
So, when we moved into our home, we had white formica countertops, with a shiny, hunter green edge. While some people may have really liked this look, it really was not my cup of tea. After much researching online, I ran across this site: http://www.remodelaholic.com/2011/08/painted-formica-countertop/. I LOVED what she had done with her countertops. I thought they looked amazing! The cost was even MORE amazing to me! I was practically giddy with excitement. I did almost exactly what she had done to her countertops. I painted them black, using silver acrylic paint to create the marbled texture, and added superfine black glitter and silver glitter all over it. While they are really pretty, knowing what I know now, I wouldn’t do them in black EVER again. It shows every single little smudge and piece of lint, dirt, food, etc. Having three boys, there are ALWAYS fingerprints and food crumbs, etc. on my countertops, no matter how often I come along and wash them down. I would probably do them in a white and gray marble look if I were to redo them with this technique again.
I did not use the Envirotex, however. I used this product from Lowe’s: http://www.lowes.com/pd_298930-1149-5050110_4294684395__?productId=3366918&Ns=p_product_qty_sales_dollar|1&pl=1¤tURL=%3FNs%3Dp_product_qty_sales_dollar%7C1%26page%3D3&facetInfo=. I do recommend getting the little handheld blow torch, you’ll need it to pop the air bubbles that do come up after you have poured and spread your epoxy. Other than that difference, I think I followed along almost exactly to what she did to her countertops, so if this is something that you decide to try, read over her directions really well. It was pretty easy, but it was VERY messy, and smelly. It wasn’t very time consuming, aside from the drying time. I have a few pictures here of the before and after of my countertops.
You can also see where we added framing around the windows to cover up that ugly metal edging that was originally around our windows. The molding was painted white after we were done with the tiling. Yet another thing we would like to replace, the windows! I would love to get more energy efficient windows put in soon!

We added subway tiles for the backsplash, also. I have also since painted (most) of the kitchen cabinets white and added new hardware. We also replaced that ridiculously shallow sink with a deeper sink. Another great thing about mobile homes… The counters aren’t as deep as stick built homes, so all those great sinks you see in Lowes and Home Depot, etc? We couldn’t buy one of those because it wouldn’t fit into the more narrow countertops. We do plan on ripping out these cabinets and counters and hopefully getting some from ReStore and painting them and adding butcher block countertops with a nice farmhouse sink. See the beautiful hunter green marble looking edge on the countertops? Yuck. We just tiled right over the wallboard. My Dad helped me do the tiling, I had never done it before, it was so fun! I did the wall in the picture below. Hubby cut the tiles that needed cutting, and then I put them up and did the rest.
They really look MUCH better in person, it is hard to get a good picture of them because they are so shiny. The silver doesn’t stand out that much in real life, the camera flash makes it stand out more than it really does. It’s been over a year now, and they have held up pretty well. They do get scratches in them kind of easily, but unless you are right down on them looking for them, you can’t really see them. For the cost of them versus granite, it was well worth it to tide us over until we can afford to completely redo the kitchen exactly the way we want to.
I’ll try to remember to add a better “after” picture in the next couple of days, to better see the end result.

Well, hello there!
Hmmm, where to start. No writer am I, by any means. I started this blog mainly to document the process of transforming our manufactured home. That’s right, our manufactured home. Or some of you out there still insist on calling it a “mobile home” although my house can’t actually go anywhere. It’s a pain at times, to be honest. Nothing is straight. Nothing is level. The walls are super thin. The quality of finishes are sorely lacking. Sometimes we’d like to scream, stomp our feet, pull our hair out, roll around on the floor and pitch an all out, honest-to-God straight up hissy fit like our kids have done when they were little. But it is so rewarding and satisfying when we complete the project and sit back and bask in the beauty of the newly renovated spot in our house! It makes it worth the cussing, sighing, scraped knuckles, sore backs, etc.
Why, you ask, are we living in a manufactured home if I’m going to complain about it that way? Well, that’s a long story. Our family of 5 moved from a suburb right outside of Detroit, MI to the beautiful woods of East Texas. Big change, huh? Not so much for me, I’ve lived in the country on and off as a child, before finally settling in Michigan when I was 11 years old, until we moved to Texas about three years ago. We were looking and looking for a home to buy, but believe it or not, there isn’t a WHOLE heck ton of homes to choose from in our small town of about 4,500 people. There’s a lot of undeveloped land around here still, which is great, I love it! Room to spread out and not have neighbors up your butt, watching and gossiping about your every move? Yes, please! We had been hunting for a home in our budget. We didn’t want to spend a lot, we didn’t want every penny we make to go towards our house payment, know what I mean? There’s so much more to life than working to just make the house payment! We also didn’t want to do a ton of work on it to make it liveable, either, seeing as how we don’t know jack squat about home repair or updating.
So, my Dad owned 13 acres, and my Uncle had moved down here and moved this manufactured home onto the back 5 acres of the property. It is all contained and fenced in together, one driveway going to both houses, etc. Kind of like their own little compound out here. My uncle decided he wanted to move, and asked us if we wanted to buy the property at a steal. Aside from the fact that it was a GREAT deal for us, who the heck else was going to move in there? My Dad wouldn’t want some strangers moving in there, so we jumped at the chance to buy it. The payment was a quarter of what we were paying for our house payment in Michigan, and rent for the house we were renting when we moved down here. And really, this manufactured home isn’t one of those manufactured homes plopped out in the middle of an empty plot of land with the removable stairs at each door. My Uncle added a full length, 72-foot covered porch, he added a metal roof to cover the house and porch, he added an addition to the front, redid the floors throughout almost all of the house. We have five acres of land to call our own, in addition to our boys being able to run all over my Dad’s eight acres as well. We have a 2,000-square foot garage that has a heated/cooled office with full bathroom in it, woods, privacy, etc. It really is great. Sometimes it’s weird for us, because I think we ourselves put this stigma on ourselves for living in a manufactured home vs. a stick-built home, but then we think about the fact that we have all this land, that huge garage, and this little house payment. Our property taxes out here vs. the city are unbelievably cheap. So, we ended up in this home, which is a 28×72 double-wide with an addition on one end of it.
SO…
THAT is the story of how we ended up here. We’re working on making this house our home, room by room, wall by wall, inch by inch.
I’m a person that is visually inspired. I like to see pictures to get ideas, and let me tell ya, there is not a whole lot out there on remodeling a manufactured home. The ones that I have been lucky enough to find though, are wow, so inspiring and amazing! I wanted to add our little projects out there, too, and share them with others going through the same process that we are. I hope that someone finds it useful!
Here is a crappy before and after pic from my iPhone of the first room that we have completely remodeled in our home. We did the living room. We added plywood beadboard to all the walls, added baseboards and molding at top and bottom, and framed out the windows. The first four pictures are the before and after. We were in the process of getting new furniture, so it was a little bare in there. The second picture is after we got the new couch. I’ll have to add a better after photo with the good camera, and with better lighting, too. That lighting makes the walls look darker than they actually are. The last picture is a view of the addition on one end of the house that used to be part of the porch, that was closed in. Please let me know if you have any questions about anything!


